Showing posts with label Guest post. Show all posts

Thursday, 14 January 2021

Guest Designing for Time-out

 Hello everyone!

I am super delighted to be doing this Guest post for the Time-out challenges. 


It's been a very long time since I played in any challenges and thus winning a challenge at TO and then Guesting with them is very special for me. 

Thank you Sandie and team for this opportunity.

The challenge this time is # 179


This challenge was a bit tricky for me and i was completely lost for ideas. But my dear friend Ishani helped me out with it. She knows about my love for Tea, infact we both share our love for Tea and can have a cuppa at any time of the day.
She suggested making a card with Tea/coffee theme using the sponsor's image. So that became the theme of my card.
Here is my card.


I am using a digital image by Stamplorations, who are the sponsors for this challenge.
The image is called Coffee Blossoms.


I coloured the image using Zig clean brush markers and highlighted them with Faber Castell polychromos. Fussy cut the image.
On a card base, I randomly stencilled some design using distress oxide and Glimmer paste. Stamped the sentiment and foam mounted the image.


Thank you for stopping by!


Follow me here!


Happy Crafting!

Linking to 


Wednesday, 15 July 2020

Digital Wednesday with STAMPlorations!

Hello everyone!!

I am at my blog today after a very long time. Life has been busy and blogging took a backspace. 
But today I am so happy and super excited to be mention that I am Guest Designing for the Digital Wednesday feature over the Stamplorations blog. 

I shall be showcasing the Boxed blooms  and Heartfelt Rose digital stamps. The Boxed blooms is a set of 4 floral images and the Heartfelt Rose is a single image of rose. Alll these florals are beautifully illustrated and gorgeous. Today, I am sharing a couple of simple and CAS cards using these digis. 

CARD 1 - Single Rose - My Garden!

For this card, I printed the Boxed rose image on a sheet of Bristol smooth watercolour paper. Coloured it with Zig markers and highlighted with Faber Castell Polychromos.


Cut around the boxed frame. On a white card base, I scored three lines using my score board just create some interest, before foam mounting the coloured image. I also stamped the sentiment from About a Rose clear stamp set.

Close-up view


CARD 2 - Celebrate Today!

For this card, I printed the Boxed Daffodil image on a sheet of Bristol smooth watercolour paper. Coloured it with Zig markers. Highlighted the shadows with Faber Castell Polychromos. 
Cut around the floral image. I die-cut a stitched square of the same size as the boxed frame. Foam mounted the Daffodil on this die-cut. On a white card base, I scored four lines using my score board just create some interest, before  adhering the die-cut with the image. I stamped the sentiment to the side of the framed image.

Close-up view


CARD 3 - Friendship, the Breathing Rose!

For my last card, I have used the Heartfelt Rose image. I printed the image in a bigger size. Coloured the image with Zig markers and fussy cut it. 


To prepare the base for my card, I used a cardstock panel and die-cut it using a border die from my stash. After die-cutting, I dry embossed this panel using a wood grain embossing folder. I trimmed the panel as per the size I desired. At this point, I lightly brushed this panel using Squeezed lemonade and Fossilized Amber Distress oxides. Foam mounted this panel on a white card base. Before mounting the panel, I stamped the sentiment from About a Rose clear stamp set. Rounded the edges of the card base using a corner punch. Lastly, foam mounted the Rose image, along the edge of the panel.

Close-up view


That's it!!! All my cards are ready.
Hope you enjoyed the quick, simple cards made by me.

If you wish to buy any of the amazing products from Stamplorations store - Main or Digital, you can use my personal code STAMPGIRLANILA and avail a 20% off from your cart value. It can be used as many times as you wish. 

For a chance to win a $15 gift code to the STAMPlorations store, leave a comment here and on STAMPlorations blog by 8th Aug 2020.

Happy Crafting!!

Thank you for stopping by!

Follow me here!


Wednesday, 21 August 2019

Guest Designing for Stamplorations # 5

Hello!!
It's time for the Digital Wednesday over the Stamplorations blog.
I can't believe it is the 5th week already.

Here are my cards for this week.

Card 1
A rainbow color washed background using watercolors, on this card front from the Fluttery Garden digital bundle. I added some glitter to the Butterflies to pop them up.
Added a heat embossed sentiment.


Card 2
A set of cards using the card front digital image from the Coffee Blossoms digital bundle.
I have done some spotlight colouring here! 
Using a craft knife, I cut open the central frame and made it into a shaker card.


Thank you for stopping by!

Find me here!

Remember to hop along and leave comments on all the Guest Designer's blog to stand a chance of winning $15 to the Stamplorations stores.


Wednesday, 17 July 2019

Guest Designing for Stamplorations # 3

Hello friends,
I am back at the blog with my post for the Digital Wednesdays for Stamplorations.
Check out all the inspirations posts over here. 

I have two cards today using the Coffee and Roses digital bundle. This bundle has 10 images and a set of some bonus tags. I printed the tags and a framed image. 
Coloured the images using Zig markers and fussy cut them.

First Card

I have used About a Rose stamp set from the store and grey ink to create the background. Stamped the sentiment. Foam mounted the tag on the card.


Set of a card and a tag.


On a white card base, I did some stencilling using white shimmer paste. Foam mounted the framed image on the card. I also coloured a matching tag for the card. The stencilling is visible in the angular picture.


Hop along and comment on all the Designer's blogs to stand a chance of winning $15 to the Stamplorations store.

Thank you for stopping by!


Playing along
(My second card with the soft colours)
(The yellow card with BG made by repeat stamping)


Saturday, 27 April 2019

Guest Post for LIM

  Hello friends!
I am super excited and honoured to be invited by the team over at "Less is More"  challenge blog, as a Guest designer for their new challenge which begins today. 

It's a One Layer card challenge with cue words as "Buds and Petals"

Here is my card for the challenge inspiration.


I am using the Cherry Blossom stamp set by Pretty Pink Posh for my card. 
I did a lot of masking using the various florals and leaves from the set, to create this arrangement. 
I coloured the image using Zig clean brush markers. Stamped the sentiment
Lastly, I added some tiny dot details to the pollens of the flowers. 
Check the close-up for details.
I have kept the card pretty simple with no embellishments whatsoever. I feel the floral arrangement fills up the card pretty much, with no need for any embellishments. 

Few more clicks 


That's all from my end.
Do hop over the challenge blog to check the beautiful inspirations by the team.


Thursday, 16 August 2018

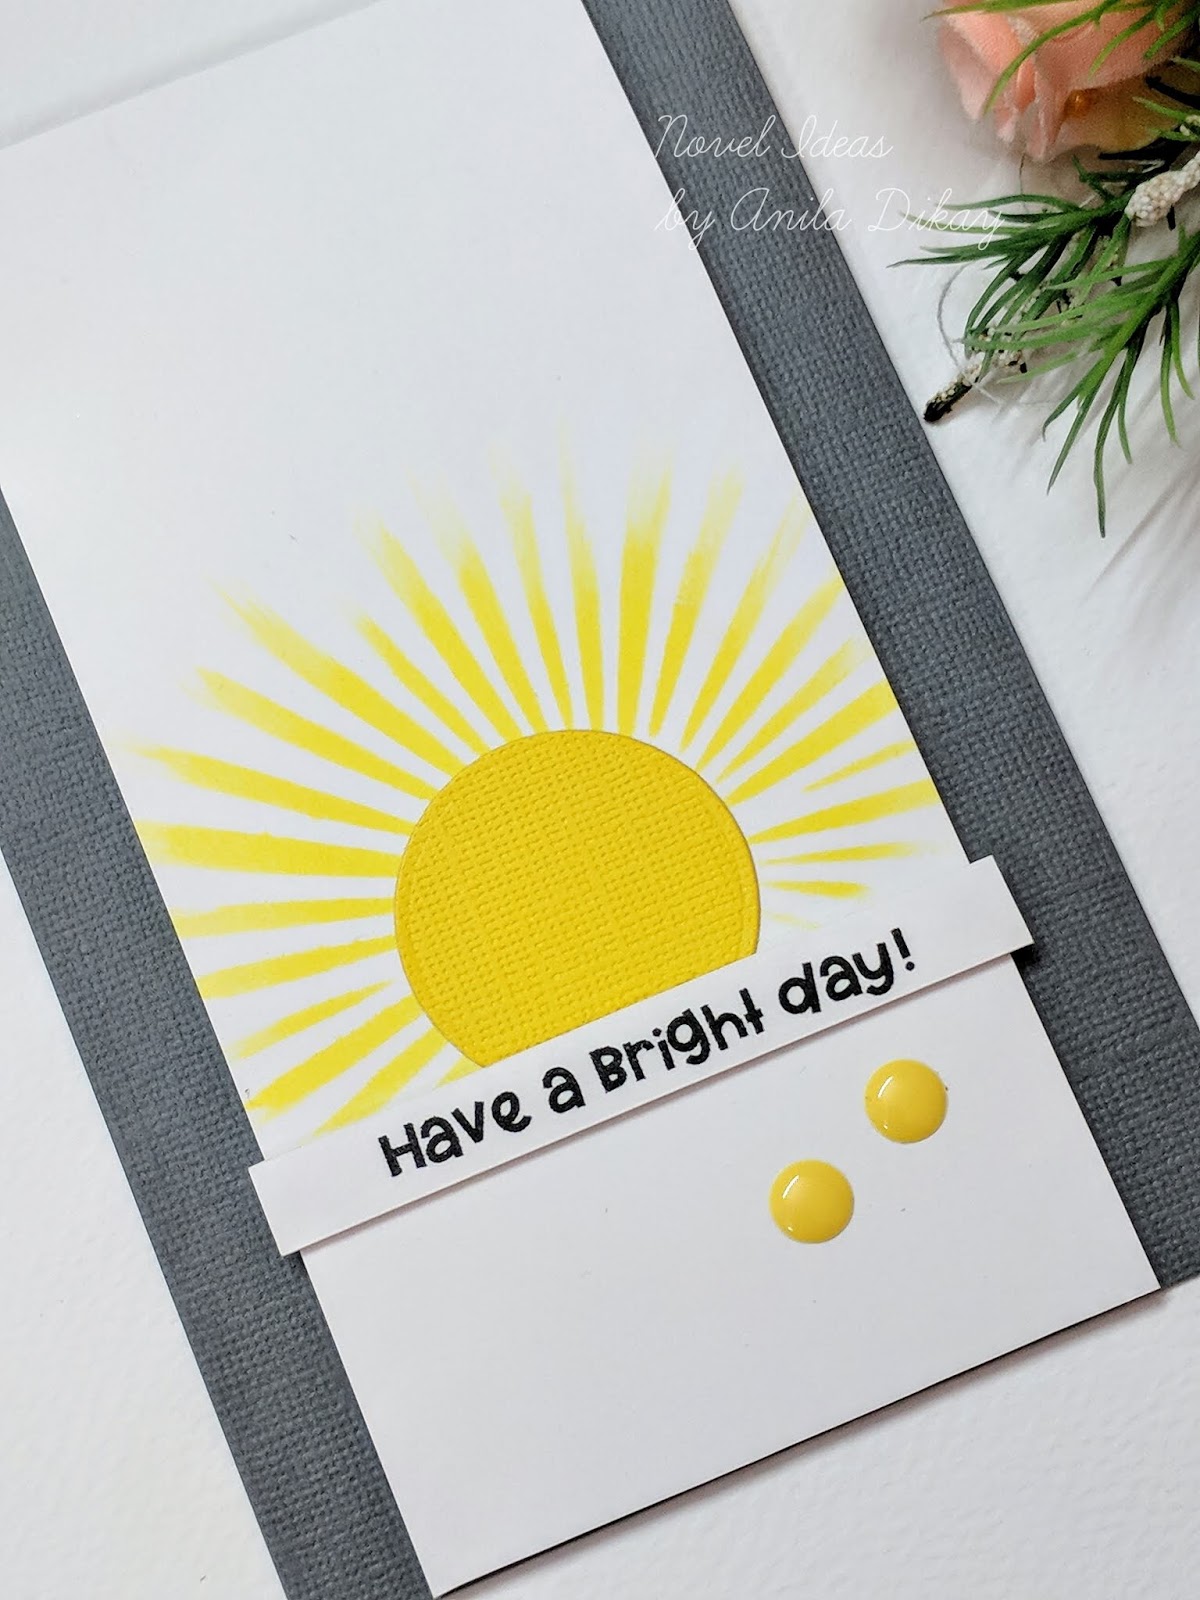
Have a bright day❤️

Hello friends!
I am super honoured to be Guest designing at Time-out challenges. 
I love their challenges and have been always participating in them. So, when Sandie offered me the Guest designing spot, I jumped at it. Thank you so much, Sandie!!

The theme for the current challenge is "Bright"

Here's my take on the challenge!


On a white card, I stencilled the sun rays using distress ink. I die-cut a circle using yellow textured cardstock. Printed the sentiment and cut it into a strip. On a grey card base, I mounted the stencilled panel using foam tape. Adhered the sun to the panel. Foam mounted the sentiment strip across the sun. Lastly, added two enamel dots.

Few more pics.


Looking forward to your take on the current challenge theme.
Thank you for stopping by!